In this article, you will find how to set up a hexo blog and deploy it.
Special thanks to Codesheep's video
0. Pre-requisite
The most important of all, don't be afraid of making mistakes!
To initiate your blog, you will need the libraries below.
0.1 Node.js
Download here -
suggest LTS version
To check whether Node.js was downloaded successfully,
type node -v in the terminal window. If something like
v12.18.2 is presented with no error message, you are free
to go for the next step.
For Windows users, terminal could be invoked by pressing
win+R, and then typecmdin the prompt window.
0.2 npm
npm is the default package management tool for
Node.js.
For Chinese users, you could switch to the mirror in
cnpmfor faster downloads. Run the command to installcnpm:
$ npm install -g cnpm --registry=https://registry.npm.taobao.org
Similar to Node.js, type npm -v to check if
it's installed successfully.
0.3 Git
git is a version control tool used widely among
programming projects. Generally speaking, it could help you keep
different versions of your project.
To configure the git globally, you could run the command after
installation. In the command, --global would set the
following parameters for all git repositories on your computer.
1
2
$ git config --global user.name "Your Name"
$ git config --global user.email "email@example.com"
0.4 hexo
With the package management tool installed, fetch the
hexo package using command:
1 | |
or: 1
$ cnpm install -g hexo
Similar to Node.js, type hexo -v to check
if it's installed successfully.
1. Initiate blog
Create a folder
1
$ mkdir blogBy default, this
blog/folder will be created in/Users/YourUserName/for both Mac and Windows users.Navigate into the folder
1
$ cd blogTo check if you are in the right folder, type
pwdto check.Initiate your blog
Make sure you are in the right folder before running command below!
1
$ sudo hexo init
The sudo parameter refers to admin access.
- Run your blog!
1
$ hexo s
By default, you will see the blog running at http://localhost:4000
2. Create a new article
As indicated in the default blog file helloworld.md, you
could use the command below to create a new blog.
1 | |
By default, it will be created in source/_posts folder.
For markdown reference, please check here.
After writing, use the following command to clean the database and generate static files for local blog.
1 | |
Vist the default link again, you could see the article you just wrote.
3. Deploy your blog
You will need a Github account or Gitee accound for deployment.
Github
Create a new repository with the name
YourFullUserName.github.ioand it has to be set to public.Install a plugin for deployment.
1
$ npm install --save hexo-deployer-gitFind the
_config.ymlfile in your blog folder, at the end of this file, modify the following content:1
2
3
4
5
6# Deployment
## Docs: https://hexo.io/docs/deployment.html
deploy:
type: git
repo: Your Github repo's link
branch: masterYour repo link should end with
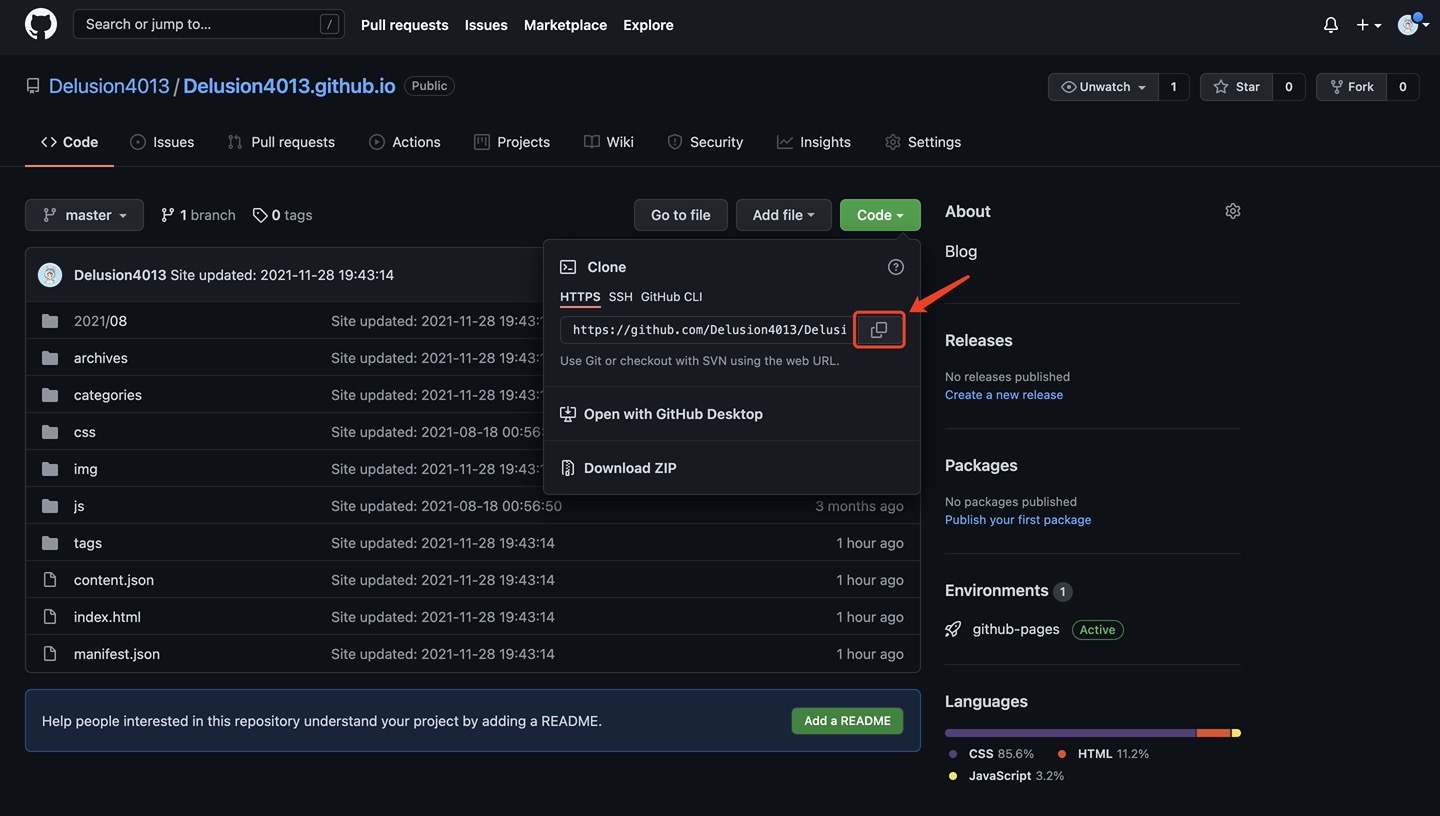
.github.io.gitwhich you could obtain here.
After saving your config file, run command below to deploy your blog.
1
$ hexo dYou may need to type your user name and password.
See you blog online!
Visit
yourUserName.github.io